After 6 months of washing dishes outside, literally at times under the stars and full moons, and another 2 months of washing them in the bathroom of our looney bin house; I am beyond thrilled to announce the arrival of permanent forever and ever kitchen countertop!
We planned for a concrete counter top for the primary reasons of cost and functionality. We watched many, many Youtube videos, consulted with our friend Jay, a true concrete expert, and then we just dove in.
Building the frame was a huge challenge Keith met like a pro. Made of 3/4 inch plywood, it was built in place and attached directly to the studs of our wall. Getting the front curve just right was a stroke of brilliance. Keith leaned the plywood up against a wall in the old house and it "bent" over time.
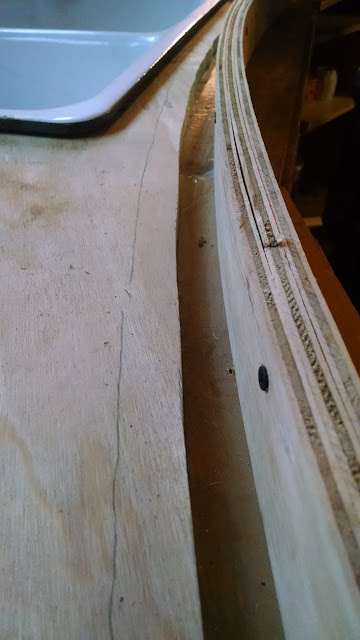
We wanted (ok ME, I wanted) an undermount sink, so after scoring a 1940's enamel, cast iron beauty for $25, Keith cut a hole for it and then built a mold to cover it. The holes in the middle of that mold allowed us to cut the mold out when the counter was done. We used small sections of PVC for the faucet holes, caulked in place so they would not move when the concrete was pushed in around them.
To give the concrete even more stability we laid in some old hog wire and then two pieces of thick rebar just behind and in front of the sink. We mixed the concrete one bag at a time in a wheelbarrow and colored it a dark grey with liquid concrete dye. Then, shovel full by shovel full we plopped it into the mold and spread it around by hand in order to get it well into all the corners. We used 9 bags of concrete in total.
As thick as it looks, it was still plenty wet enough to screed the way we needed to in order to work the aggregate to the bottom and bring up more of the concrete 'cream" for a smoother surface...we hoped.
Getting the concrete spread in and around the sink and faucet holes was tricky and the end result is far from perfect but after unmolding we were able to grind down the rough patches and the faucet (with some extensions) fit beautifully. We let it cure for three days. Easy to do since we had a major ice storm the day after we poured the counter and we were without power those three days. The mold came off easily but the surface was very rough. What can I say? We're amateurs. I tried to spread a thin slurry across the top to fill in small pin holes when in hindsight we realized if we had just sanded the top well, it would've gone better.
I contemplated many ideas for a backsplash, tile or fabric covered with plexiglass, but finally decided on three good coats of washable semi-gloss paint in Swedish blue. (See below) Since we had the paint on hand already it met all the must-be-cheap criteria I harbored. I still need to figure out some sort of durable trim where the counter and backsplash meet but for now we are in culinary business! The counter, just like our looney bin house, is far from perfect but since total cost was less than $200, including the shelving below, it is exactly the work horse we dreamed of for this homestead of ours.


I am obsessed with your progress. Really, I check to see for updates here DAILY. I love it all!
ReplyDeleteAmazing job for something so fiddly. You can always grind back the surface in warmer weather, when you can open the windows and doors. But its doing what you need, so its perfect.
ReplyDeleteLooks great! All your hard work is paying off beautifully.
ReplyDeleteLooks great! All your hard work is paying off beautifully.
ReplyDeleteIt looks great, well done.
ReplyDeleteThat looks incredible, LOVE LOVE LOVE it!
ReplyDeleteIt looks great! And I bet it will wear well too. Kudos to you both!
ReplyDeleteWhat a benchmark to your plans. I can only imagine how happy you are with counter and sink IN THE HOUSE! Well conceived and executed. Yay. 3 days without power? Did the rocket furnace keep you warm? Did you break out the hurricane lamps? How WAS it those 3 days in the bin? Cold coming this week. Break out the mittens.
ReplyDeleteThis looks awesome. :-) Since you will have to caulk no matter what you install, you could use silicone caulk on the seam.
ReplyDeleteWhat an amazing journey of construction you are on....it will be fabulous. I will follow closely to watch your progress. :-)
ReplyDeletet is natural to feel that way because somehow, beautifying the self can help achieve the needs of every individual. Vintage beauty tips
ReplyDelete